en
Moving your crypto from a centralized exchange to KriptoK is straightforward once you understand the basics. Here's how to do it safely.
Moving your crypto from a centralized exchange to KriptoK is straightforward once you understand the basics. Here's how to do it safely.
The most important rule: The network you choose on your exchange must match the network you select in KriptoK.
For example, if you're transferring USDT:
Sending on the wrong network can result in permanent loss.
In your KriptoK wallet, tap Receive.
Choose the token you want to receive. The network is displayed next to the token name.Make sure you select the correct network - it must match the network you'll use on your exchange.Common tokens like USDT, USDC, or ETH exist on multiple chains.
Popular options:
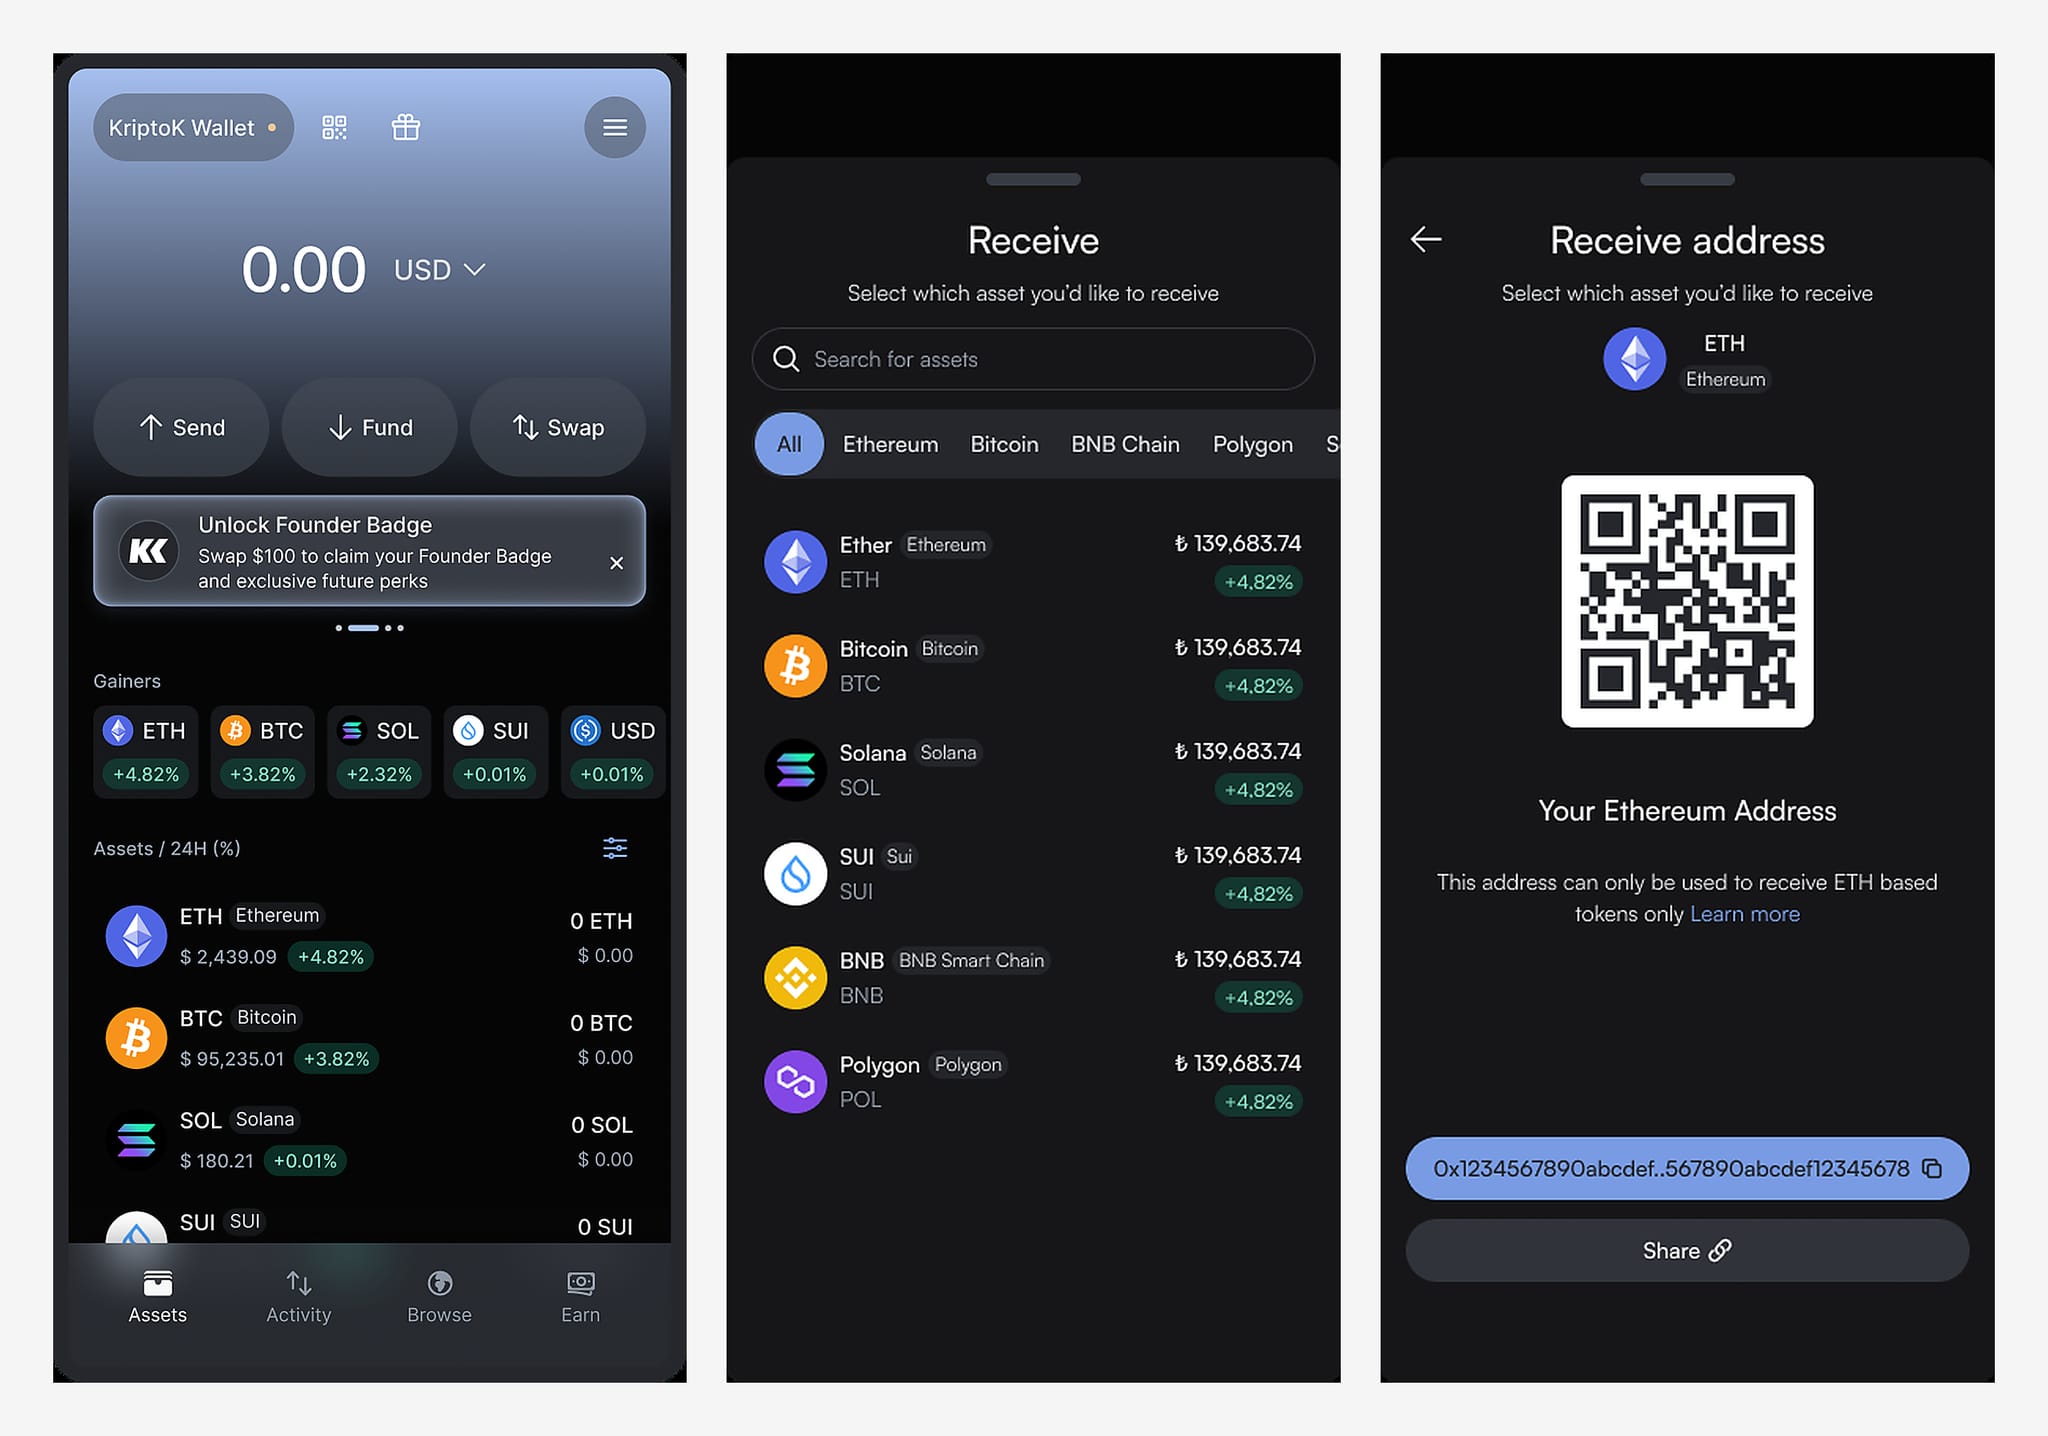
Once you've selected the token and network, KriptoK displays your receiving address (a long string of letters and numbers).
Tap Copy or use the QR code if your exchange supports it.
Open your exchange app (Binance, BTCTurk, Paribu, Kraken, etc.) and locate the token you want to send.
Tap Withdraw or Send.
.png)
In the "Recipient Address" field on your exchange, paste the address you copied from KriptoK.
Security tip: Always verify the first 4 and last 4 characters after pasting. Malware can sometimes change clipboard contents.
Your exchange will ask which network to use. This must exactly match the network you chose in KriptoK.
If you selected Polygon in KriptoK, select Polygon here.
Decide how much to transfer. Your exchange will show:
Note: Exchanges often add their own withdrawal fees on top of network fees. These can sometimes be higher than the actual blockchain fee, so it's worth comparing networks.
First-time tip: Send a small test amount first (e.g., $10-20) to confirm everything works correctly.
Review everything carefully:
Confirm the transaction. Your exchange may require 2FA (two-factor authentication).
Blockchain transfers take different amounts of time:
Your exchange will provide a transaction ID (TxID). You can track it on a block explorer.
Once confirmed on the blockchain, your tokens appear in KriptoK automatically. Open the app and check your balance.
"My crypto hasn't arrived"
"I sent to the wrong network"
"Network fees seem high"
"My token isn't showing in my wallet"